The Significance of Proper Roof Ventilation
May 6, 2025
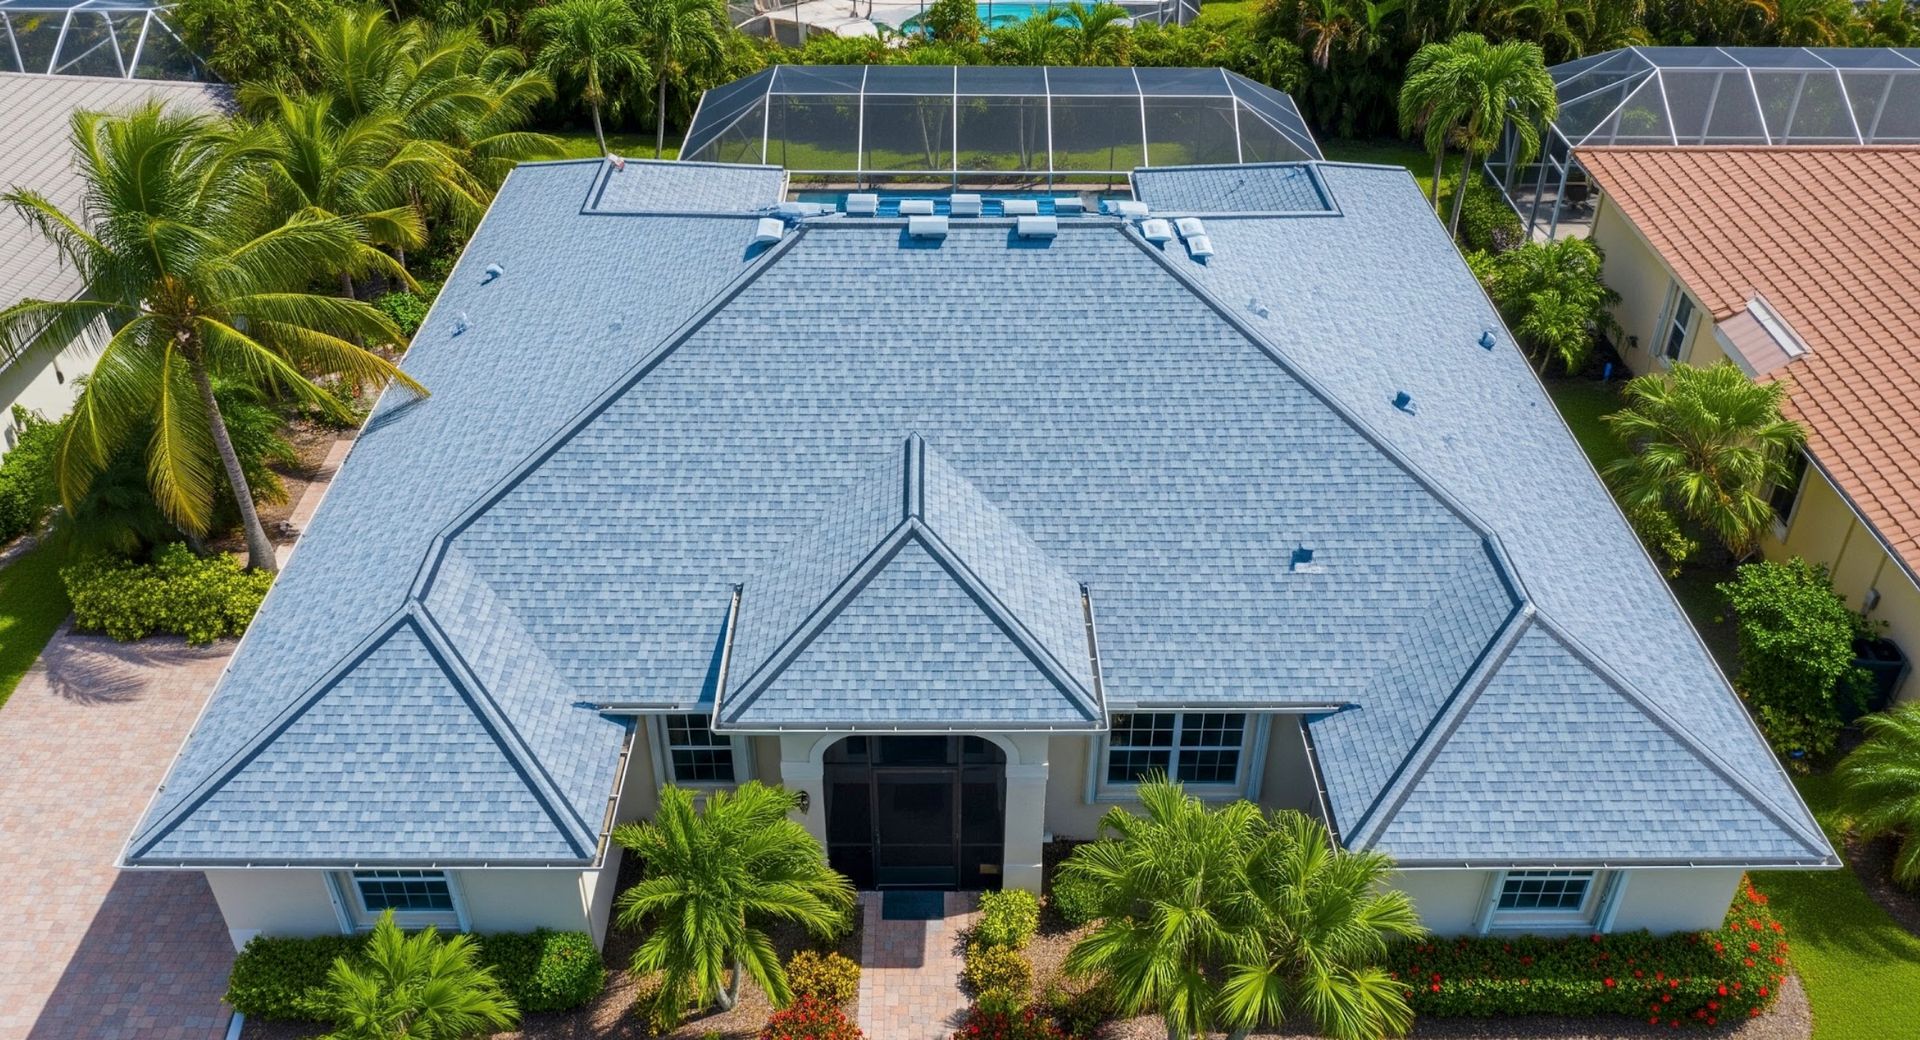
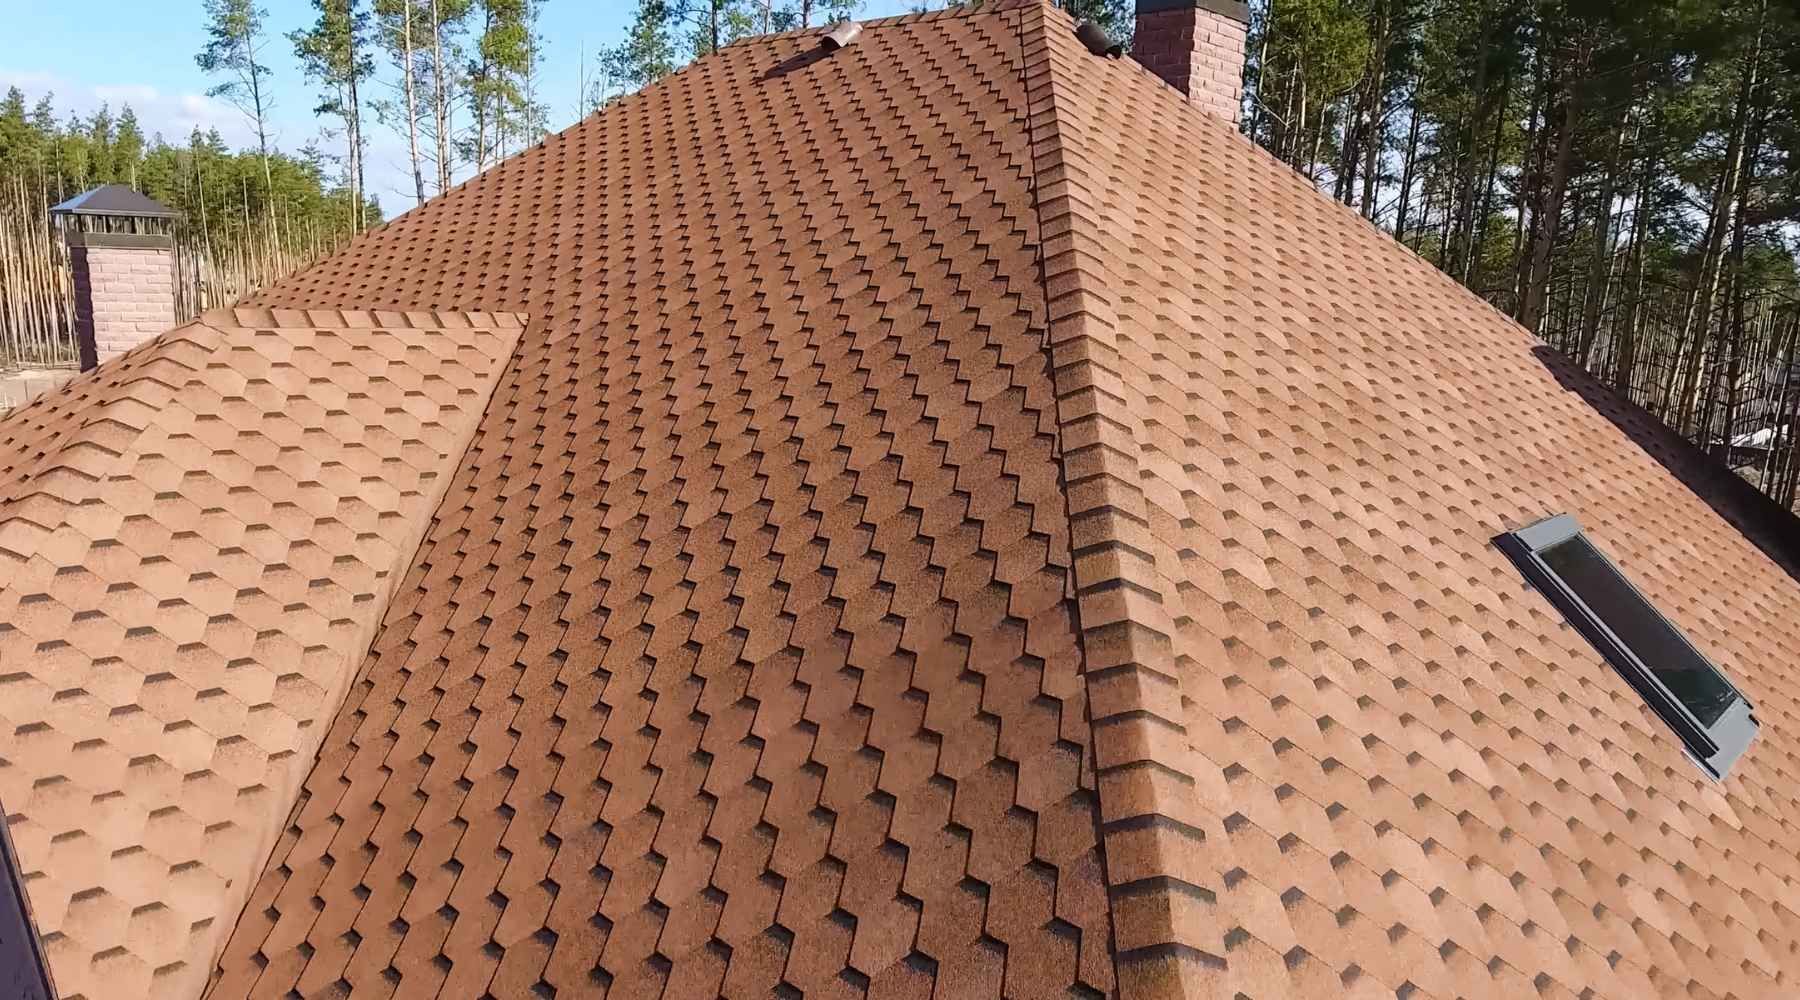
Ensuring proper roof ventilation is crucial for maintaining the health and longevity of your home, particularly in regions like Columbus, Ohio, where seasonal temperature fluctuations are pronounced. Proper ventilation regulates temperature and moisture levels in the attic, preventing issues such as mold growth, ice dams, and premature roof aging. Inadequate ventilation can lead to a host of problems, including moisture accumulation, increased energy costs, and structural damage. By ensuring a balanced and effective roof ventilation system, homeowners can protect their property from these issues, enhance indoor comfort, and extend the lifespan of their roofing system.
What Is Roof Ventilation?
Roof ventilation involves a system of intake and exhaust vents that facilitate continuous airflow through the attic space. This process helps regulate temperature and moisture levels, preventing issues such as mold growth, ice dams, and premature deterioration of roofing materials.
Components of a Roof Ventilation System
A well-designed roof ventilation system consists of several key components:
-
Intake Vents: Located at the lowest part of the roof, typically in the soffits, intake vents allow fresh, cool air to enter the attic. This influx of air is essential for pushing out the warm, moist air that accumulates inside.
- Exhaust Vents:
Positioned at or near the roof's peak, exhaust vents enable hot, humid air to escape from the attic. Common types of exhaust vents include ridge vents, box vents, and turbine vents.
- Soffits: These are the undersides of the roof's overhang and often contain intake vents. Soffits play a dual role by providing ventilation to the attic while preventing pests from entering.
-
Ridge Vents:
Installed along the roof's ridge, these vents allow warm air to escape uniformly along the peak, promoting consistent airflow throughout the attic.
Benefits of Proper Roof Ventilation
Extends Roof Lifespan
Adequate ventilation prevents the accumulation of heat in the attic, which can cause roofing materials, such as shingles, to deteriorate prematurely. By maintaining a cooler attic environment, you can significantly extend the life of your roof.
Enhances Energy Efficiency
In the summer months, a well-ventilated attic reduces the burden on your air conditioning system by minimizing heat buildup. Conversely, during winter, proper ventilation helps maintain a consistent attic temperature, reducing the risk of ice dams and promoting overall energy efficiency.
Prevents Moisture Damage
Without proper ventilation, moisture from everyday activities can accumulate in the attic, leading to mold growth, wood rot, and insulation damage. Effective ventilation allows this moisture to escape, preserving the structural integrity of your home.
Common Roof Ventilation Systems
Understanding the different types of roof ventilation systems can help you make informed decisions about your home's needs.
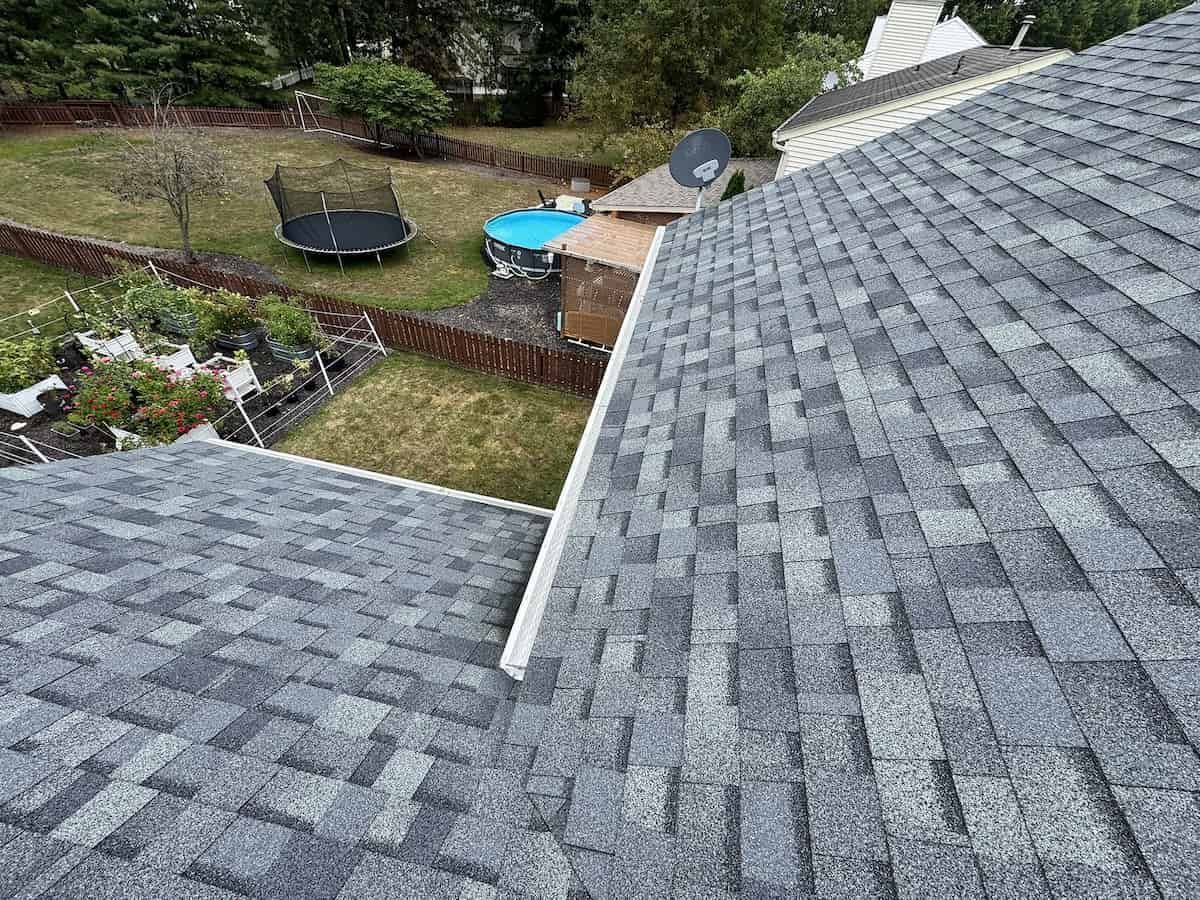
- Ridge Vents
Installed along the peak of the roof, ridge vents provide a continuous outlet for warm, moist air to escape from the attic. They are often paired with soffit vents to create a balanced ventilation system.
-
Soffit Vents
Located under the eaves of the roof, soffit vents allow fresh air to enter the attic, facilitating proper airflow when used in conjunction with ridge vents.
-
Gable Vents
Positioned on the exterior wall of the attic, gable vents promote cross-ventilation by allowing air to flow in and out of the attic space. They are particularly effective in areas with consistent wind patterns.
Signs of Inadequate Roof Ventilation
Identifying the symptoms of poor roof ventilation can help you address issues before they escalate.
Excessive Heat in the Attic
If your attic feels excessively hot during the summer, it may indicate insufficient ventilation, leading to increased cooling costs and potential
roof damage.
Mold and Mildew Growth
The presence of mold or mildew in the attic or upper areas of your home suggests that moisture is not being effectively vented, posing health risks and structural concerns.
Ice Dams in Winter
Ice dams form when warm air from the attic melts snow on the roof, which then refreezes at the eaves. This can lead to water infiltration and damage to the roof and interior of the home.
How to Ensure Proper Roof Ventilation
Achieving optimal roof ventilation involves several key steps:
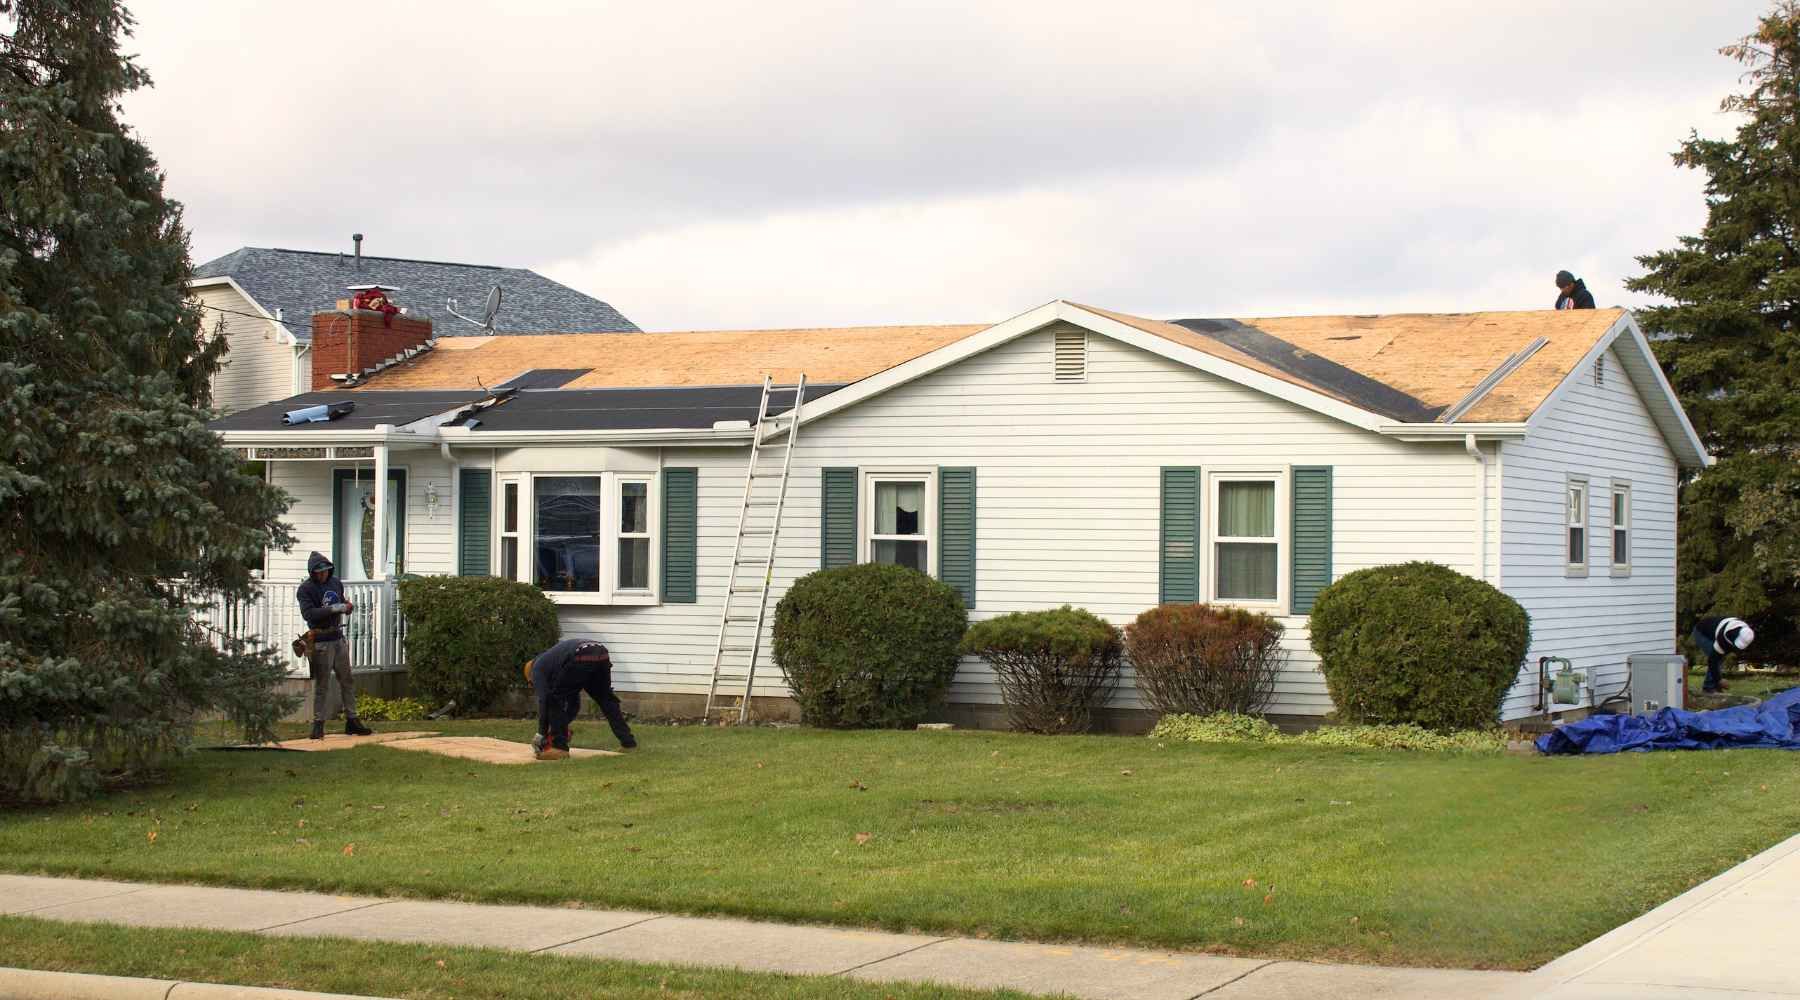
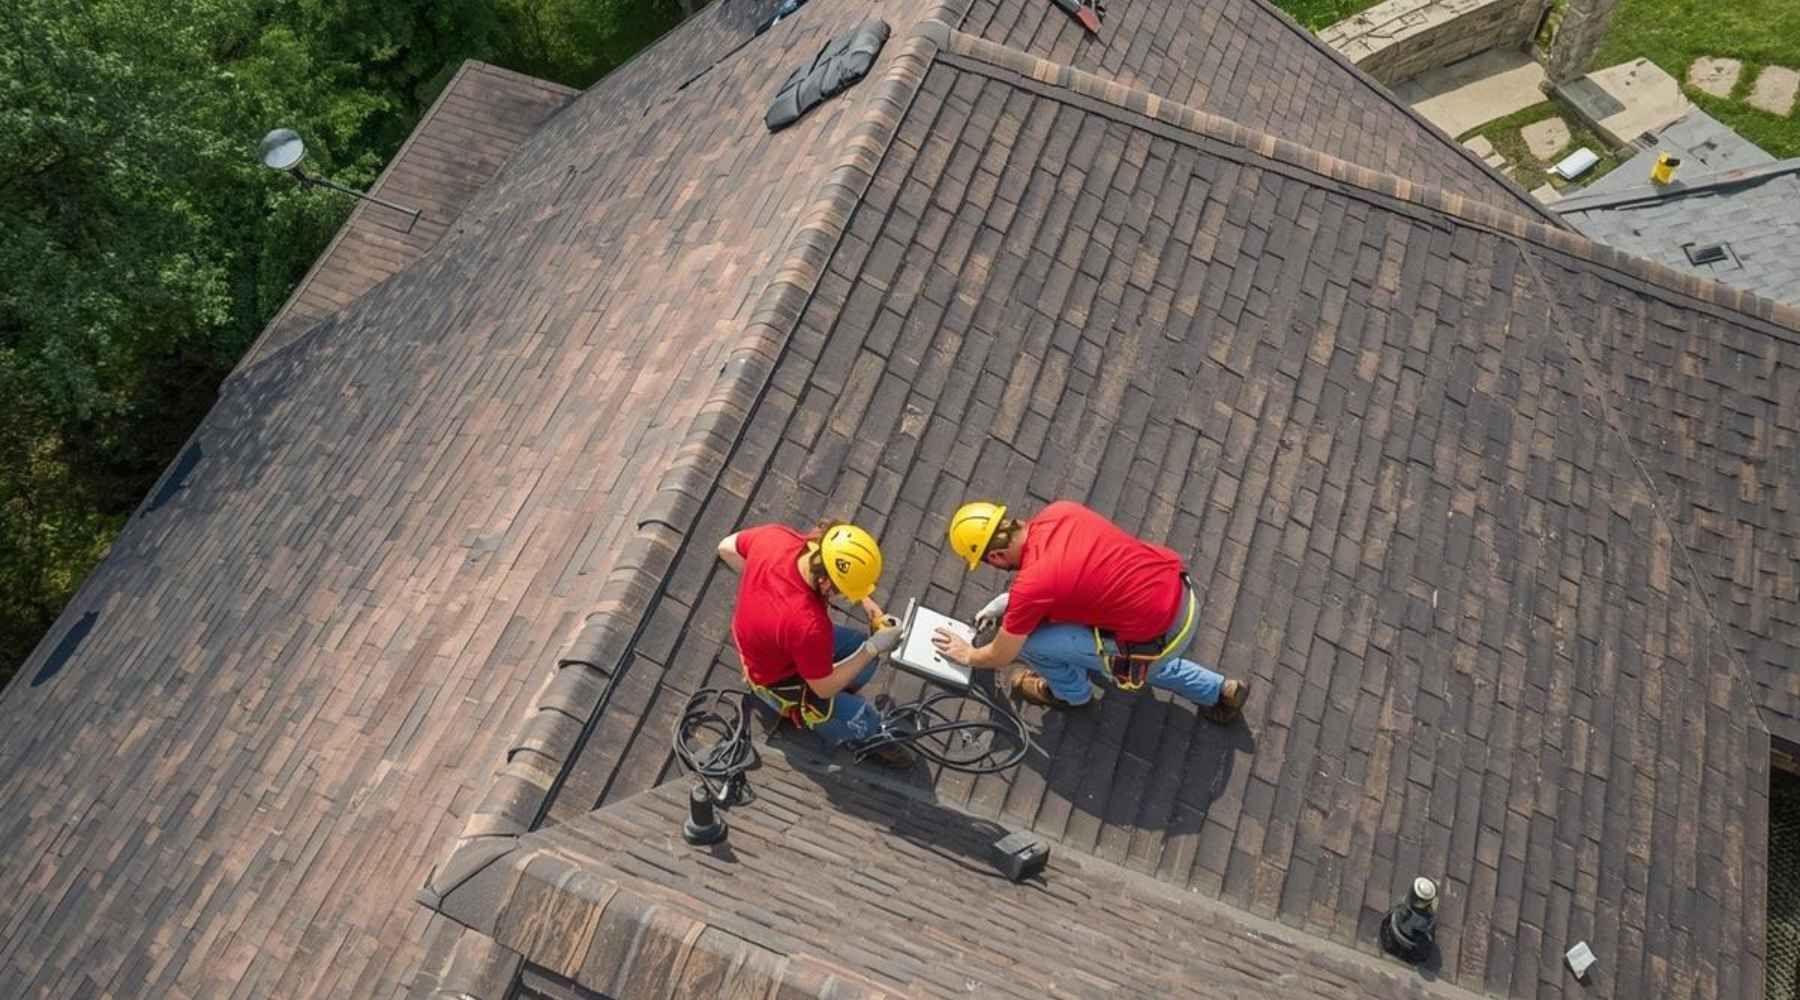
Professional Inspection
Engage a reputable roofing contractor to assess your current ventilation system. They can identify deficiencies and recommend appropriate solutions tailored to your home's design and local climate conditions.
Balanced Ventilation System
Ensure that your roof has a balanced system of intake and exhaust vents. This equilibrium allows for continuous airflow, effectively regulating temperature and moisture levels.
Regular Maintenance
Periodically inspect and maintain your roof vents to prevent blockages from debris, nests, or insulation. Keeping vents clear ensures they function as intended, promoting a healthy roofing system.
Why Choose Allstate Exteriors for Your Roofing Needs?
At Allstate Exteriors, we understand the critical role that proper roof ventilation plays in maintaining the integrity of your home. Serving the Columbus, Ohio area since 2002, our family-owned and operated business offers comprehensive roofing services, including:
Residential Roof Replacements:
Upgrade your home's protection and aesthetic appeal with our expert roof replacement services.
Residential Roof Repairs:
Address leaks and damage promptly with our reliable repair solutions.
Siding, Windows & Doors, and Gutters:
Enhance your home's exterior with our range of services designed to improve functionality and curb appeal.
Our commitment to quality workmanship and customer satisfaction is reflected in our lifetime warranty on materials and a 2-year labor warranty. Trust us to safeguard your most valuable asset with professionalism and care.
Common Roof Ventilation Mistakes to Avoid
Implementing an effective ventilation system requires careful planning and execution. Avoiding common pitfalls can save homeowners from costly repairs and energy inefficiencies. Here are some frequent mistakes:
Incorrect Placement of Vents
Proper ventilation relies on a balanced system where intake vents are positioned at the lowest points of the attic (typically in the soffits), and exhaust vents are located at or near the roof's peak. Placing intake vents too high or exhaust vents too low disrupts this balance, hindering effective airflow.
Mixing Different Ventilation Systems
Combining multiple types of exhaust vents, such as ridge vents with box vents, can short-circuit the ventilation system. This practice disrupts the natural airflow, leading to inefficient ventilation and potential moisture buildup.
Insufficient Intake Ventilation
A common oversight is neglecting adequate intake ventilation. Without sufficient intake vents, exhaust vents cannot function effectively, resulting in poor airflow and increased attic temperatures. Ensuring a balanced ratio of intake to exhaust vents is essential for optimal performance.
Blocking Vents with Insulation
During insulation installation, it's crucial to ensure that vents remain unobstructed. Blocking soffit or other intake vents with insulation impedes airflow, leading to moisture accumulation and reduced ventilation efficiency.
Frequently Asked Questions About Roof Ventilation
Understanding roof ventilation can be complex. Here are some common questions homeowners often ask:
Why is roof ventilation important?
Proper roof ventilation helps regulate temperature and moisture levels in the attic, preventing issues like mold growth, ice dams, and premature roof aging.
How can I tell if my roof needs better ventilation?
Signs include excessive heat in the attic, condensation, mold growth, and higher energy bills. Inspecting the attic during different seasons can provide clues.
Do all homes need roof vents?
Yes, proper roof ventilation is essential for every home. Without it, heat and moisture can build up, causing damage to your roof and potentially leading to expensive repairs down the line.
Can poor ventilation increase energy bills?
Definitely! Poor ventilation makes your HVAC system work much harder to regulate indoor temperatures, which results in higher energy costs over time.
How do roof vents work to improve airflow?
Roof vents improve airflow by allowing hot air to escape from the attic and drawing in cooler air through other openings. This helps regulate temperature and moisture levels, preventing roof damage and reducing energy costs.
Safeguarding Your Home with Effective Roof Ventilation
Proper roof ventilation is not merely an optional feature but a necessity for maintaining the health and efficiency of your home. By ensuring adequate airflow through your attic, you can extend the lifespan of your roof, enhance energy efficiency, and prevent moisture-related issues. Partnering with experienced professionals like Allstate Exteriors ensures that your roofing system is equipped to protect your home effectively for years to come.
When you live in a place as beautiful and storm prone as Cape Coral, FL , your roof isn’t just another part of the house. It’s your first and most vital line of defense against Florida’s blazing sun, high humidity, and hurricane season downpours. That’s why finding a dependable roofing contractor who knows the local weather, building codes, and roofing needs is more than just smart, it’s essential. Here at Allstate Exteriors , we’ve been proud to provide professional roofing in Cape Coral, FL , delivering high performance results to homeowners throughout neighborhoods like Pelican, Cape Harbour, Trafalgar, and Burnt Store. Our mission is simple: protect homes with expert craftsmanship, premium materials, and trustworthy service . Why Roofing in Cape Coral Requires Specialized Expertise Cape Coral isn’t just another Florida city, it’s a unique community with specific architectural styles, salt air exposure from the Gulf, and frequent tropical weather patterns. The roofs here aren’t just sloped pieces of protection, they’re carefully engineered systems that must withstand intense environmental pressure year after year. When we take on a roofing job in Cape Coral , we bring not only our tools and materials, but also a deep understanding of: Wind uplift ratings necessary for hurricane protection Reflective materials to reduce cooling costs during brutal Florida summers Ventilation solutions to combat moisture and mold Local permit and code requirements specific to Cape Coral and Lee County Whether it’s replacing an old asphalt shingle roof in the Yacht Club area or upgrading to a standing seam metal roof near Surfside Boulevard, we tailor each project for long term durability and local conditions. Real Results: Recent Roofing Projects in Cape Coral We’ve recently completed several roofing projects in Cape Coral that highlight the scope of our expertise and the quality we bring to each job. One standout job took place in the Rose Garden neighborhood. The homeowner reached out after repeated leaks from their 20-year-old tile roof. After a comprehensive inspection, we recommended a total tear off and reinstallation using high end barrel style clay tiles that match the home’s Mediterranean style. The result? Not only does the roof now provide superior water resistance and wind protection, but it also enhances the curb appeal of the entire property. You wouldn’t believe the transformation, and the homeowner couldn’t be happier. In another project over in Southwest Cape Coral near Cape Coral Parkway, we installed a modern metal roofing system for a homeowner looking to increase energy efficiency. Thanks to its reflective coating and seamless installation, the house now stays cooler in the summer and costs less to maintain. Our Roofing Services in Cape Coral, FL No two roofs and no two roofing clients are alike. That’s why we offer a wide variety of roofing services in Cape Coral , tailored for every need and budget: Roof Replacement – Is your roof past its prime? We’ll walk you through the best materials and options available, whether it's asphalt shingles, metal, tile, or flat roof systems. Roof Repair – From missing shingles to flashing failures and wind damage, our repairs are quick, thorough, and built to last. Roof Inspections – Whether you're buying a new home in Cape Coral or just want peace of mind, our inspections help identify potential problems before they become expensive headaches. Emergency Storm Repairs – When tropical weather strikes, we offer fast response service to secure your property and begin the restoration process. Every one of our jobs comes with clear communication, honest pricing, and a team of licensed, insured professionals committed to getting it right the first time.
Your roof rarely fails overnight. Most roofing problems start small, subtle, and easy to miss until they turn into expensive repairs. For homeowners in Blacklick, Ohio, catching these early warning signs is one of the smartest ways to protect your home, avoid major disruptions, and extend the life of your roof . With Ohio’s mix of freezing winters, humid summers, and sudden storms, your roof is constantly under pressure. Homes across Blacklick , Reynoldsburg, and Gahanna experience everything from ice dams to wind damage , which means early detection is not just helpful, it is essential. At Allstate Exteriors, we have inspected and repaired hundreds of roofs throughout the area. The pattern is always the same. The homeowners who act early save thousands. The ones who wait often face full replacements sooner than expected. This guide will walk you through how to identify early roof damage, what causes it in Blacklick, and what you can do right now to prevent small issues from becoming costly problems. Why Early Roof Damage Detection Matters Blacklick homes face a unique combination of environmental stress. Winter brings freeze and thaw cycles that expand and contract roofing materials. Summer adds humidity and UV exposure that weaken shingles over time. Small issues such as a lifted shingle or minor flashing gap may not seem urgent. However, these tiny entry points allow moisture to seep in. Over time, that moisture can damage underlayment, rot the roof deck, and even affect your attic insulation. Early roof damage detection is about stopping problems at the surface before they reach the structure beneath. It is not just about avoiding repairs. It is about preserving your home’s integrity. The Most Common Early Signs of Roof Damage Knowing what to look for is the first step. Many signs of early roof damage are visible from the ground or inside your home if you know where to check. Granules in Gutters and Downspouts If you notice a sand-like material collecting in your gutters, those are shingle granules. These granules protect your roof from UV rays. Once they begin to wear away, shingles become vulnerable to cracking and deterioration. Homes in Blacklick often experience accelerated granule loss due to summer heat and storm activity. Curling or Buckling Shingles Shingles should lie flat. If you see edges curling upward or sections that appear uneven, it is a sign that your roof is aging or experiencing moisture issues. Curling shingles are especially common in older roofs across neighborhoods near Broad Street and Waggoner Road. Dark Streaks and Algae Growth Humidity in Blacklick creates the perfect environment for algae growth, especially on shaded roof sections. While it may start as a cosmetic issue, algae can trap moisture and slowly degrade roofing materials. Small Interior Water Stains One of the earliest indoor signs is a faint stain on your ceiling or walls. Even a small discoloration can indicate a slow leak that has been active for weeks or months. Missing or Loose Shingles After storms, it is important to visually check your roof. Even one missing shingle can expose the underlying structure to water damage.
Your home is more than just a place to stash your stuff; it’s the place you’ve poured your life into. Living here in Westerville, we’re lucky to have such a great mix of tight-knit neighborhoods and quick access to everything we need. Whether you’re grabbing coffee near Uptown or taking the kids to spend an afternoon at Inniswood, you know this area is special. But let’s be honest: Ohio weather isn't always kind to our houses. Between the brutal freeze-thaw cycles in the winter and that sticky humidity we get living near the reservoir, your roof takes a beating. It’s the first line of defense for everything inside your walls. If you’ve been spotting a few stray shingles in the yard or just have a nagging feeling that your roof is getting a bit long in the tooth, you’re in the right place. As a local roofing company, we’ve been up on enough Westerville rooftops to know exactly what makes them tick, and what tends to go wrong. Why "Local" Actually Matters There’s a big difference between a national franchise and a crew that actually lives and works here. We aren’t just reading a manual; we’ve dealt with the same storms you have. The Ohio Reality Check We don’t have mild winters here. We have "ice dam" winters. When your attic isn't venting heat properly, the snow on your roof melts, runs down to the eaves, and freezes again. That cycle can force water right under your shingles and into your insulation. If you’ve ever seen water spots on your ceiling after a winter thaw, that’s usually the culprit. On the flip side, our summers can be relentless. All that heat and humidity can lead to moss or algae growth, especially on the north side of the house where the sun doesn't hit as much. If you let that stuff sit, it eventually eats away at the grit on your shingles. Matching the Neighborhood We’ve worked on everything from the historic homes with unique angles to the newer builds in the suburbs. Every home needs a slightly different strategy. A quick patch might be fine for one house, but a total re-roofing might be the smarter, cheaper play for another. We’re not here to upsell you; we’re here to tell you what your specific roof needs to last another 20 years.
Comprehensive Ohio roofing guide covering repair, replacement, and installation tips for homes and businesses. Protect your roof year-round.
Running a business in Beavercreek, Ohio comes with its unique set of challenges and responsibilities. One of the most critical investments for any commercial property is the roof. A well-designed, high-quality roof protects your building, employees, and assets while enhancing energy efficiency and reducing long-term maintenance costs. Understanding the best options for your property is crucial, and Commercial Roofing Solutions for Beavercreek Businesses from Allstate Exteriors are designed to meet the diverse needs of local businesses throughout Greene County. From office buildings in central Beavercreek to retail centers near Wright-Patterson Air Force Base, commercial roofing requires specialized knowledge. Allstate Exteriors combines decades of experience, local expertise, and a commitment to quality to ensure that your business receives roofing solutions that stand the test of time. Why Commercial Roofing Matters for Beavercreek Businesses Commercial roofs face different pressures than residential roofs. They cover larger areas, often have more complex structures, and are exposed to frequent foot traffic during maintenance. Weather in Beavercreek adds another layer of complexity. Summer storms bring heavy rain and high humidity, while winter conditions include snow, ice, and temperature fluctuations. Over time, these elements can degrade roofing materials if not properly maintained or installed. Investing in a professional roofing system reduces the risk of leaks, structural damage, and costly emergency repairs. It also protects your employees, inventory, and customers from exposure to the elements. A well-planned roof contributes to the operational efficiency of your business and can even improve energy performance, which is increasingly important for modern commercial properties.
Protect your Bellbrooke, OH home year-round with Allstate Exteriors’ seasonal roof maintenance checklist. Learn expert tips, local insights, and proven strategies to extend the life of your roof and prevent costly damage.